Complete Guide to Mera Peak Route Map: Detailed Breakdown, Elevation, Difficulty, and Essential Tips
Tuesday, October 15, 2024
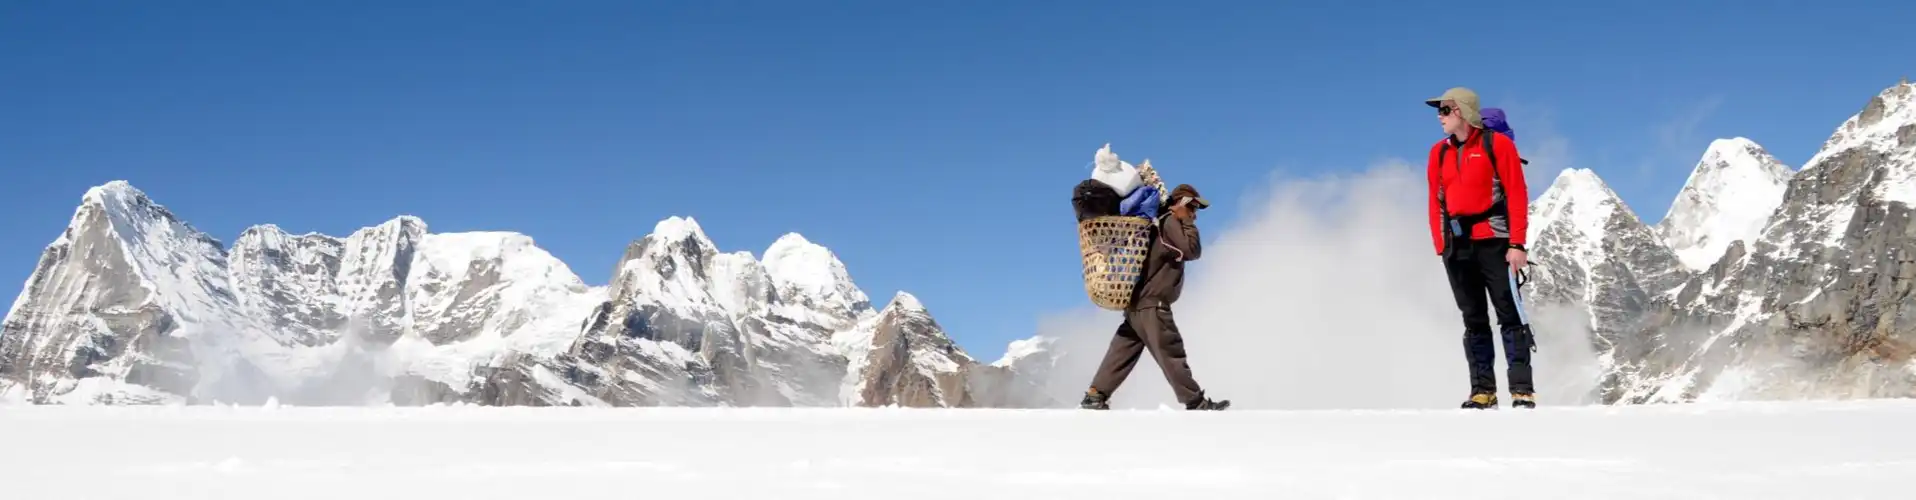
Mera Peak is 6,476 meters high in the Solu Khumbu region of the Himalayas, making it one of Nepal’s highest trekking peaks. Trekkers depend on the Mera Peak Route Map to navigate diverse terrains, from dense forests to high-altitude glaciers. Climbing this peak offers a rewarding challenge for those seeking a moderately difficult adventure.
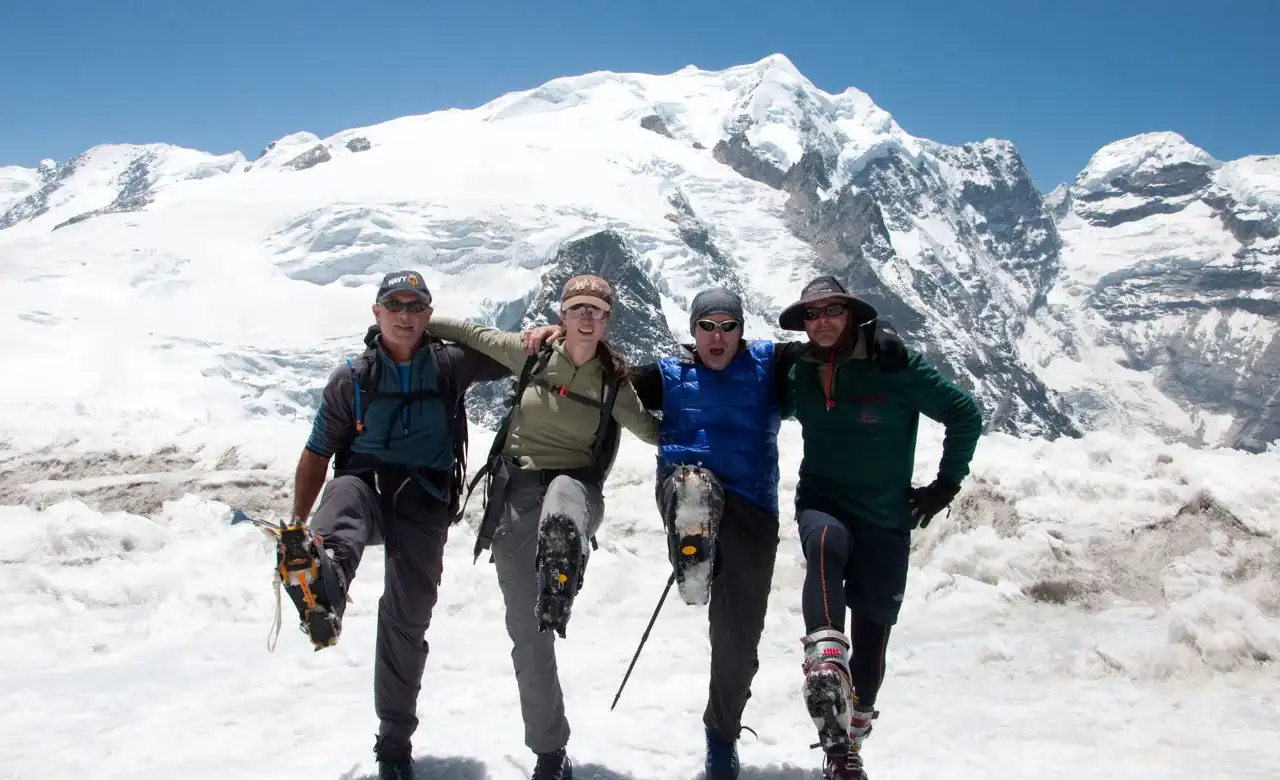
A group of climbers enjoy a lighthearted moment during their trek to Mera Peak, with snow-covered mountains creating a dramatic and beautiful backdrop.
Both climbers and trekkers appreciate the Mera Peak route for its mostly non-technical ascent, allowing access to individuals with basic mountaineering skills. Along the trek, adventurers enjoy breathtaking views of several 8,000-meter peaks, including Everest, Lhotse, and Makalu, which enhance the overall experience.
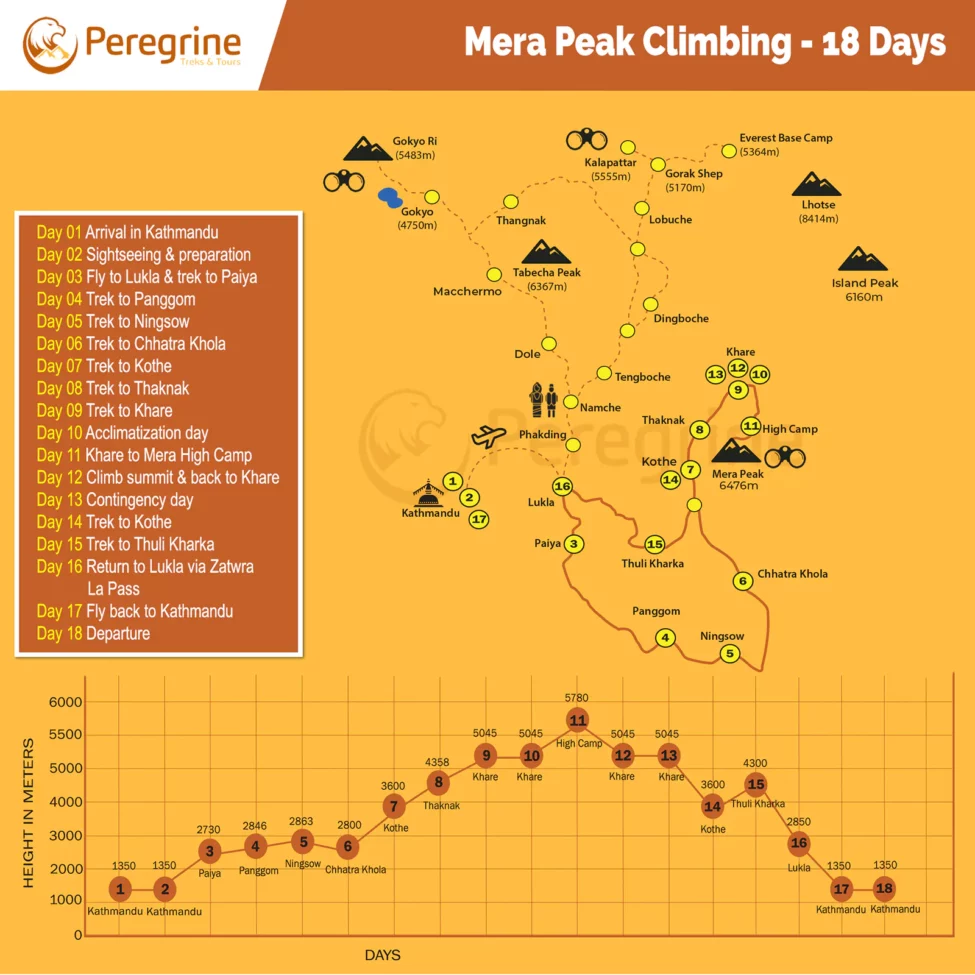
Starting from Lukla, the route to Mera Peak’s summit guides trekkers through varied landscapes. They pass through Sherpa villages like Paiya and Kothe, then ascend to the base and high camps before reaching the top. Each Mera Peak Route Map section offers unique experiences, from vibrant rhododendron forests to challenging glacier crossings.
The Mera Peak Route Map outlines several key points that guide climbers toward a successful summit.
Below is a comprehensive breakdown of each stop, including their significance and the estimated trekking times and distances. This guide provides detailed directions for the trek from Lukla to the summit of Mera Peak.
Lukla (2,860 meters)
Lukla marks the starting point for the Mera Peak trek. A short flight from Kathmandu brings trekkers to this bustling town known for its airport. The trek to Paiya begins here, leading trekkers through lush landscapes and small Sherpa villages.
Trekking time: 4-5 hours
Distance: 8 km
Paiya (2,730 meters)
After leaving Lukla, trekkers reach Paiya, a small settlement offering basic accommodations. The trail to Paiya winds through forests and crosses small streams, introducing trekkers to gradual altitude gain.
Trekking time: 4-5 hours
Distance: 7 km
Panggom (2,846 meters)
From Paiya, the route heads to Panggom, a traditional Sherpa village. Here, trekkers pass through forested areas, enjoying a peaceful environment. Crossing the Panggom La pass adds a mild challenge to the day.
Trekking time: 5-6 hours
Distance: 7 km
Nashing Dingma (2,600 meters)
The trail to Nashing Dingma involves descending through forests and crossing rivers. Trekkers rest here before tackling more challenging terrain. The route includes suspension bridges and steep descents.
Trekking time: 5-6 hours
Distance: 9 km
Chhatra Khola (2,800 meters)
As trekkers move toward Chhatra Khola, they pass through bamboo forests and may encounter wildlife. This forested area provides beautiful mountain views, but the path becomes narrower and more rugged.
Trekking time: 4-5 hours
Distance: 8 km
Kothe (3,600 meters)
Leaving Chhatra Khola, trekkers ascend toward Kothe. The altitude increases significantly here, and the scenery changes from forests to open landscapes. Kothe, located along the Hinku River, offers a chance to rest before continuing to higher elevations.
Trekking time: 5-6 hours
Distance: 7 km
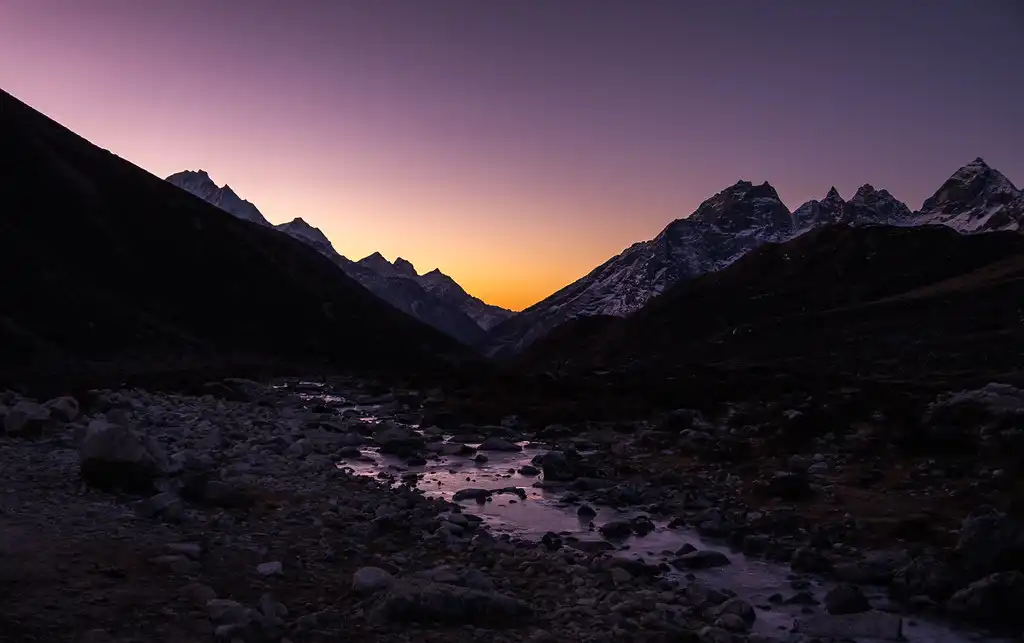
Thangnak (4,350 meters)
Thangnak is a key acclimatization stop on the Mera Peak Route Map.
An early morning start at Thangnak as the sky glows in shades of orange and purple, with the silhouettes of towering mountains in the distance and a serene stream flowing through the rocky landscape.
Trekkers enjoy stunning views of surrounding mountains and glaciers while preparing for the tougher sections.
Trekking time: 4-5 hours
Distance: 8 km
Khare (5,045 meters)
The route from Thangnak leads trekkers to Khare, the last major settlement before the base camp. Khare is essential for acclimatization as trekkers adjust to the higher altitudes. The trail becomes more rugged, with impressive glacier views along the way.
Trekking time: 4-5 hours
Distance: 6 km
Mera Peak Base Camp (5,300 meters)
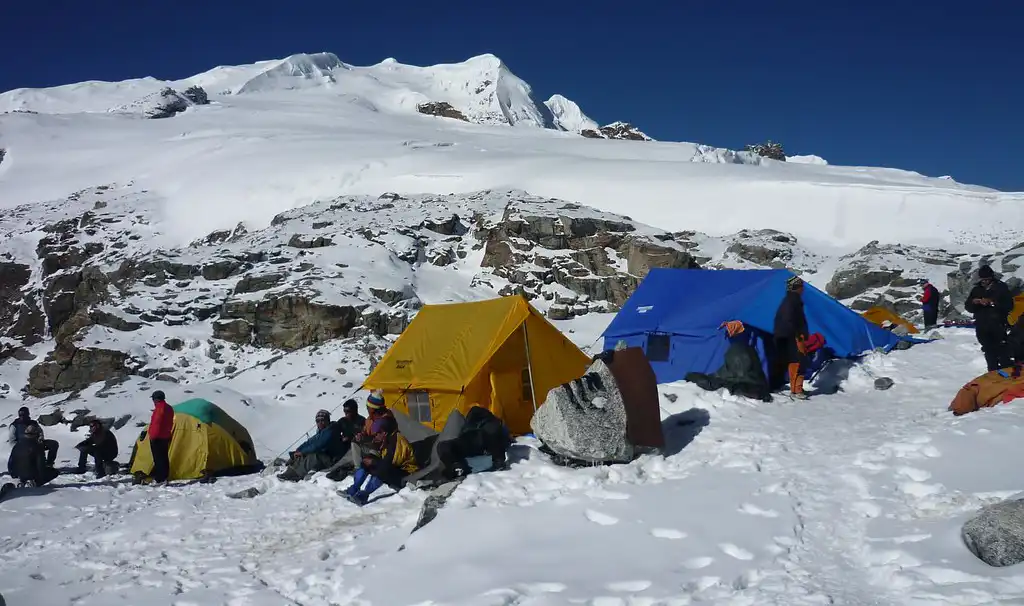
Mera Peak Base Camp signals the transition from trekking to mountaineering.
Climbers rest and prepare at Mera Peak Base Camp, with colorful tents set up on snow-covered ground, surrounded by majestic mountain peaks and clear skies.
Climbers prepare their gear and undergo final training here. The camp is near a glacier, and the weather can be unpredictable.
Trekking time: 4-5 hours
Distance: 5 km
Mera Peak High Camp (5,800 meters)
From base camp, trekkers ascend to High Camp. The climb to this point is steep and demanding, but the views of Everest, Lhotse, and Makalu are rewarding. High camp is the final resting spot before the summit attempt, with trekkers arriving in the afternoon and resting before an early morning ascent.
Trekking time: 3-4 hours
Distance: 4 km
Mera Peak Summit (6,476 meters)
The final ascent from High Camp to the summit is the most challenging part of the trek. Trekkers set off in the early morning to avoid adverse weather conditions. The climb involves navigating snow-covered ridges using crampons and ropes. Attaining the summit offers stunning vistas of the Himalayan range, justifying the extensive effort required.
Understanding the altitude shifts along the Mera Peak Route Map is key to making a successful ascent. This guide outlines the elevation changes and provides essential tips for acclimatization and avoiding altitude sickness.
Altitude Changes Along the Route
The climb to Mera Peak begins in Lukla at 2,860 meters and reaches the summit at 6,476 meters. The route moves through multiple camps and significant waypoints, each offering different challenges as the altitude increases:
Lukla (Start Point): 2,860 meters
Paiya: 2,730 meters
Panggom: 2,846 meters
Nashing Dingma: 2,600 meters
Chhatra Khola: 2,800 meters
Kothe: 3,600 meters
Thangnak: 4,350 meters
Khare: 5,045 meters
Mera Peak Base Camp: 5,300 meters
High Camp: 5,800 meters
Summit: 6,476 meters
Tips on Acclimatization and Avoiding Altitude Sickness
Prepare for Acclimatization Days: Add acclimatization days to your schedule. Thangnak and Khare are ideal places to relax and acclimatize to height changes.
Hydrate Often: Ensure that there is water during the trek. If dehydration from the high altitude occurs, the consequences will be even heavier, so it is very important to drink water.
Do Not Rush for The Heights: Make several stops ascending to higher levels. Gradual climbing avoids rapid body changes and minimizes the chances of altitude sickness.
Be Changed: Look out for and treat altitude sickness signs such as headaches, dizziness, nausea, or extreme tiredness. Timely onset of symptoms is important for treatment to be prescribing medications.
Seek Medical Help: Acetazolamide (Diamox) or other similar drugs that enhance acclimatization; discuss these drugs with your physician.
Sleep at a Lower Elevation: If there is any indication of altitude sickness, then make it a point to sleep at an elevation lower than the maximum elevation attained for that day.
Mera Peak Route Difficulty
The Mera Peak Route Map presents a thrilling yet challenging trek and climbs for adventurers. Proper preparation is essential to face the physical and technical demands of the route. Below is a detailed explanation of the difficulty and experience required to complete the Mera Peak climb successfully.
Physical Challenges of the Mera Peak Route
Climbing Mera Peak demands physical endurance due to long trekking days, steep ascents, and high altitudes. Trekkers must be ready to handle significant distances and diverse terrains. Some of the key physical challenges include:
High Altitude: As trekkers ascend from Lukla (2,860 meters) to the summit (6,476 meters), they must adjust to thin air and decreasing oxygen levels. It can cause fatigue, making acclimatization extremely important.
Long Trekking Days: Trekkers often walk 6-8 hours daily. Sections near Khare, Base Camp, and High Camp are particularly steep and require excellent stamina.
Rough Terrain: The route crosses rocky paths, moraines, and glaciers. Although technically straightforward, these sections require balance and careful footing.
Technical Challenges of the Mera Peak Route
Although classified as a trekking peak, Mera Peak features certain sections that present technical challenges. These challenges become more apparent during the glacier crossings and the final approach to the summit, where climbers face icy slopes.
Glacier Travel: Trekkers must navigate glaciers using crampons and ice axes. While these portions are not highly technical, knowing how to use basic climbing gear effectively is important.
Summit Day: The ascent to the summit requires crossing snow-covered ridges and navigating crevasses. Climbers need to rope up and use proper footwork and crampons for safety.
Experience Required for the Mera Peak Trek
The Mera Peak Route Map depicts a moderately challenging walk that requires a certain level of physical fitness and basic mountaineering skills. Novice climbers can also make the climb, but we strongly suggest all high-altitude trekkers have prior experience before attempting this climb. This route will suit the expectations of climbers who have been to the mountains before or trekking at more than 4000 meters high.
Camping and Accommodations Along the Mera Peak Route
The Mera Peak Route Map showcases various accommodation options, from teahouses in the lower reaches to camps in higher elevations, ensuring trekkers have comfortable resting spots throughout their climb.
Locations for Accommodation
Teahouses in Lower Sections: Along the route, basic teahouses in villages like Paiya, Panggom, and Kothe provide simple rooms, warm meals, and opportunities for cultural interaction. These facilities offer basic amenities and shared accommodations.
Tents at Higher Camps: As you ascend to higher altitudes such as Khare, Base Camp, and High Camp, tent camping becomes standard. Guides and support teams set up tents, which serve as your primary lodging in these rugged conditions with limited facilities.
Conditions at Mera Peak Base Camp and High Camp
Mera Peak Base Camp (5,300 meters): Base Camp offers basic tent accommodations amid cold temperatures and strong winds. Here, climbers acclimatize and prepare for the ascent to High Camp.
High Camp (5,800 meters): Conditions at High Camp become more severe, with trekkers sleeping in tents on snow under freezing temperatures. Equipping yourself with the right gear is crucial for comfort and safety before the final push to the summit.
Tips for Preparing for Overnight Stays
Select an Appropriate Sleeping Bag: Choose a sleeping bag suitable for sub-zero temperatures. It is especially vital at High Camp, where temperatures plummet.
Utilize Insulated Sleeping Mats: An insulated sleeping mat adds extra warmth and cushioning, essential when sleeping on snow or cold surfaces.
Maintain Hydration and Nutrition: Consuming sufficient fluids and nutritious meals is vital to sustain energy during cold nights at higher altitudes.
Wear Layered Clothing: Layer your clothing to manage body temperature effectively as it gets colder at night. Essentials include warm socks, gloves, and a hat.
Best Time to Trek the Mera Peak Route
It is very important to choose the right season to trek Mera Peak. The Mera Peak Route Map suggests that spring and autumn are the best seasons for this adventure due to the reasonable weather.
Best Seasons to Trek: Spring and Autumn
Spring (March to May): This season provides mild weather and clear skies. Trekkers experience warmer days and can admire the blooming rhododendron forests. As elevation increases, temperatures range from 10°C to -15°C.
Autumn (September to November): Autumn, the peak trekking season, boasts clear, stable weather. The crisp air enhances the visibility of surrounding mountains, though temperatures may drop as winter nears.
Weather Conditions and Their Impact
Spring is ideal for trekking due to its warmth, though occasional rains in lower areas may require waterproof gear. Prepare for colder temperatures as you ascend.
Autumn: Autumn is optimal for trekking because of dry, stable conditions. Stable weather minimizes delays and route closures, but be ready for colder temperatures towards the season’s end, especially at higher camps.
Permits and Regulations for Mera Peak
Before beginning your Mera Peak trek, you must obtain a few important permits. The Mera Peak Route Map passes through areas with specific regulations, and having the right licenses ensures your trek follows all legal requirements. Below is a breakdown of the essential permits and how to obtain them.
Necessary Permits for Mera Peak
Mera Peak Climbing Permit: This permit is required to climb Mera Peak. The cost varies based on the season.
Spring: USD 250
Autumn: USD 125
Winter and Summer: USD 70
Makalu Barun National Park Entry Permit: You must get this permit since Mera Peak lies within Makalu Barun National Park. For foreign visitors, the cost is approximately NPR 3,000.
Local Area Permit (Pasang Lhamu Rural Municipality Permit): Trekkers also need a local area permit, which costs NPR 2,000.
Process for Obtaining Permits
Mera Peak Climbing Permit: You can apply for this permit at Kathmandu’s Nepal Mountaineering Association (NMA) office. Bring a copy of your passport and passport-sized photos, and complete the necessary forms.
Makalu Barun National Park Permit: You can obtain this permit at the Nepal Tourism Board office in Kathmandu or the park entrance. You will need to provide a copy of your passport and photos.
Local Area Permit: You can get this permit in Kathmandu or Lukla, which is the starting point of the trek. Some trekking agencies can handle all permit arrangements in advance, making the process easier.
Essential Gear for Mera Peak Route
Trekking Mera Peak requires proper gear for harsh weather and high altitudes. The Mera Peak Route Map guides climbers through different terrains, and having the right equipment is essential for trekking and climbing. Below is a comprehensive packing list to help you prepare.
Climbing Gear
Crampons: Crampons are essential for walking on snow and ice, particularly during the final ascent.
Ice Axe: An ice axe provides balance and is crucial for navigating glaciers.
Climbing Harness: A harness is necessary for roped climb sections.
Carabiners and Ascenders: These are useful for securing yourself to fixed ropes during steep climbs.
Helmet: A helmet protects against falling rocks or ice.
Cold-Weather Clothing
Insulated Jacket (Down or Synthetic): This jacket will keep you warm at high altitudes, particularly during cold nights at Base Camp and High Camp.
Fleece Layers: Fleece provides warmth during cold trekking days.
Base Layers: Moisture-wicking base layers help regulate your body temperature by keeping you dry.
Waterproof Jacket and Pants: Waterproof outer layers protect you from rain, snow, and wind.
Gloves (Inner and Outer): Insulated and waterproof gloves are necessary to keep your hands warm.
Warm Hat and Balaclava: A hat protects your head and face from the cold.
Trekking Essentials
Trekking Boots: Waterproof trekking boots with good ankle support are critical for handling long hikes and rough terrain.
Trekking Poles: Poles help reduce strain on your knees and aid in balancing on uneven terrain.
Backpack (40-50 liters): You will need a durable backpack with a rain cover to carry your gear during the trek.
Sleeping Bag: A sleeping bag rated for extreme cold (at least -20°C) is essential for staying warm at high altitudes.
Sunglasses with UV Protection protect your eyes from intense sunlight and snow glare.
Headlamp with Extra Batteries: A headlamp is crucial for early morning climbs, especially on summit day.
Additional Essentials
Water Purification Tablets or Filter: Clean drinking water is scarce in remote areas, so always carry a purification method.
Snacks and Energy Bars: High-energy snacks provide quick fuel during long trekking days.
First Aid Kit: Include bandages, blister treatments, altitude sickness medication, and pain relievers.
Sunblock and Lip Balm: High-altitude sun can cause burns, so use sunblock and lip balm with SPF protection.
Portable Charger or Solar Charger: A charger ensures your devices remain powered in areas with limited electricity access.
Navigational Tips for the Mera Peak Route
Proper navigation is very important for a successful and enjoyable trek, especially on the Mera Peak Route Map. Though many trekkers surround the Mera Peak route, technological advances and knowing how to read a map accurately will help ensure you are on the correct path. Here, we provide useful navigation tricks and instructions on how to read a trekking map for the routes found in the Himalayas.
Utilizing Maps and GPS on the Route
Carry a Physical Map: Even if, as is often the case, one intends to use GPS technology, it is important to possess a detailed Mera Peak Route Map while on the trek. For instance, when batteries are exhausted or the weather is rough, physical maps that do not rely on electronic devices will be useful.
Employ GPS as a Secondary Tool: It is acceptable to bring a GPS device along the trek to provide accurate position coordinates since this is perhaps its main use. However, GPS devices hindered by poor outside conditions, such as trees and altitudes, can sometimes compromise their precision.
Download Maps for Offline Use: When going on a trek, ensure you have uploaded the relevant maps from your cellphone or GPS, as appropriate. Google Maps and Gaia GPS are great applications that help map trips when networks are unavailable.
Regularly Check Your Bearings: Ensure you use your compass and physical map several times during trekking to orient yourself. Maintain elaborate confirmation of your position at carefully chosen checkpoints like habitation, water, and circle eclipses within mountains to stick to the charted direction.
Highlight Important Locations: Mark essential spots such as campsites, water sources, and checkpoints on your map or GPS. This strategy helps you organize your trek and effectively track your progress.
Interpreting Trekking Maps for Himalayan Routes
Understand Contour Lines: Learn to read contour lines on trekking maps; these indicate elevation changes. On the Mera Peak Route Map, tightly spaced lines mean steep terrain, whereas lines spaced further apart denote gentler slopes. This knowledge is crucial for preparing for the trek’s more demanding sections.
Identify Natural Landmarks: Search for landmarks like rivers, glaciers, and mountain ridges to guide you. These features are typically marked clearly on Himalayan trekking maps and can serve as navigational aids.
Recognize Important Symbols: Get familiar with the symbols commonly used on maps that represent features like campsites, teahouses, and rivers. Quickly understanding these symbols enhances your map-reading efficiency while on the move.
Review Elevation Profiles: Most trekking maps feature an elevation profile at the bottom, which details the route’s altitude fluctuations. Observing the elevation profile on the Mera Peak Route Map equips you for steep climbs or descents, particularly the approach to High Camp.
Note the Scale and Distances: Pay attention to the map’s scale, which assists in calculating the distances between various points. Knowing the scale helps you estimate the time needed to reach subsequent stops or landmarks.
Conclusion: Navigating the Mera Peak Route
The Mera Peak Route Map ensures a safe and successful climb. Climbers must prepare both physically and mentally to tackle this high-altitude challenge. By thoroughly understanding the route, acclimatizing properly, and packing the necessary gear, you can enjoy one of the most rewarding trekking experiences in the Himalayas.
Studying the Mera Peak Route Map carefully before starting your trek helps you stay on track and manage the challenges of the terrain and altitude. Familiarizing yourself with the map allows you to anticipate steep sections, plan your acclimatization breaks, and navigate confidently throughout the route.
We strongly encourage all climbers to explore the route map in detail, obtain the necessary permits, and prepare for the unique challenges ahead. With the right planning and mindset, your climb to Mera Peak will become an unforgettable adventure.